Launch Guide
Email templates
What are Email Templates and the benefits of using Email Templates?
The reason why we constructed this template is because we know that our clients and partners need a way to communicate with their applicants. We also know that there will be multiple scenarios and conditions which an email communication must be delivered to the applicant in a timely and compliance way.
Finally, every organization interacts with their clients differently and at different junctures. So we created a configurable, do-it-yourself email templating tool and editor for our clients to design their own emails and email templates.
We will show you how these email templates will be linked to the LendAPI Decision Engine as well as LendAPI’s workflow orchestration system where emails can be sent out systematically as well as from back office dispositions.
Where can I find Email Templates functionality?
On the left navigation screen, under Workflows, you will find Email Templates. This is where you can find all of the pre-programmed email templates for you to edit and link to Decision Outcomes.
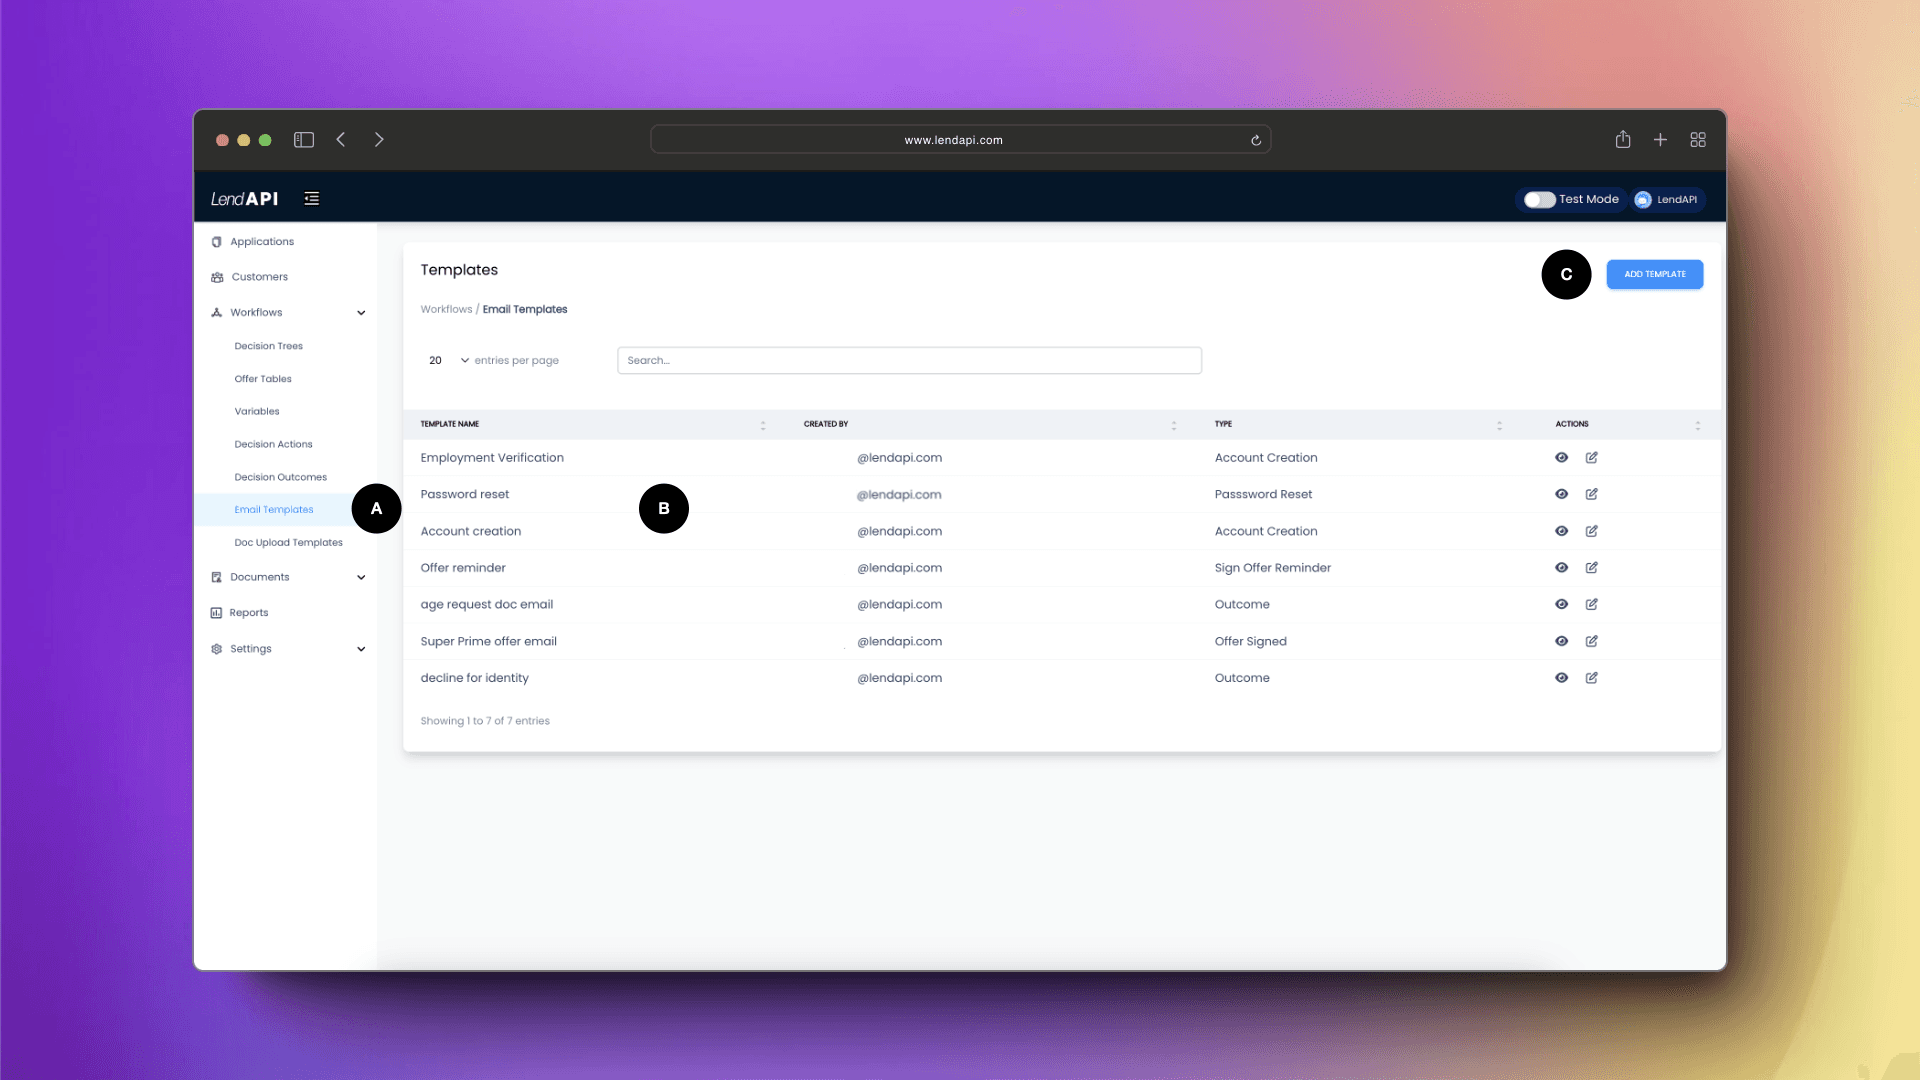
A. Email Templates is located on the left navigation menu within the Workflow section
B. A list of all email templates will display her
C. You can add a new template by clicking on the “Add Template” button
Editing an Email template
Let’s take a closer look at how to edit an email template. Let’s dive into the “Employment Verification” email template. We mentioned this template in our Doc Upload Template section of the documentation where we tied a Doc Upload Template into an email template. We will repeat this process here.
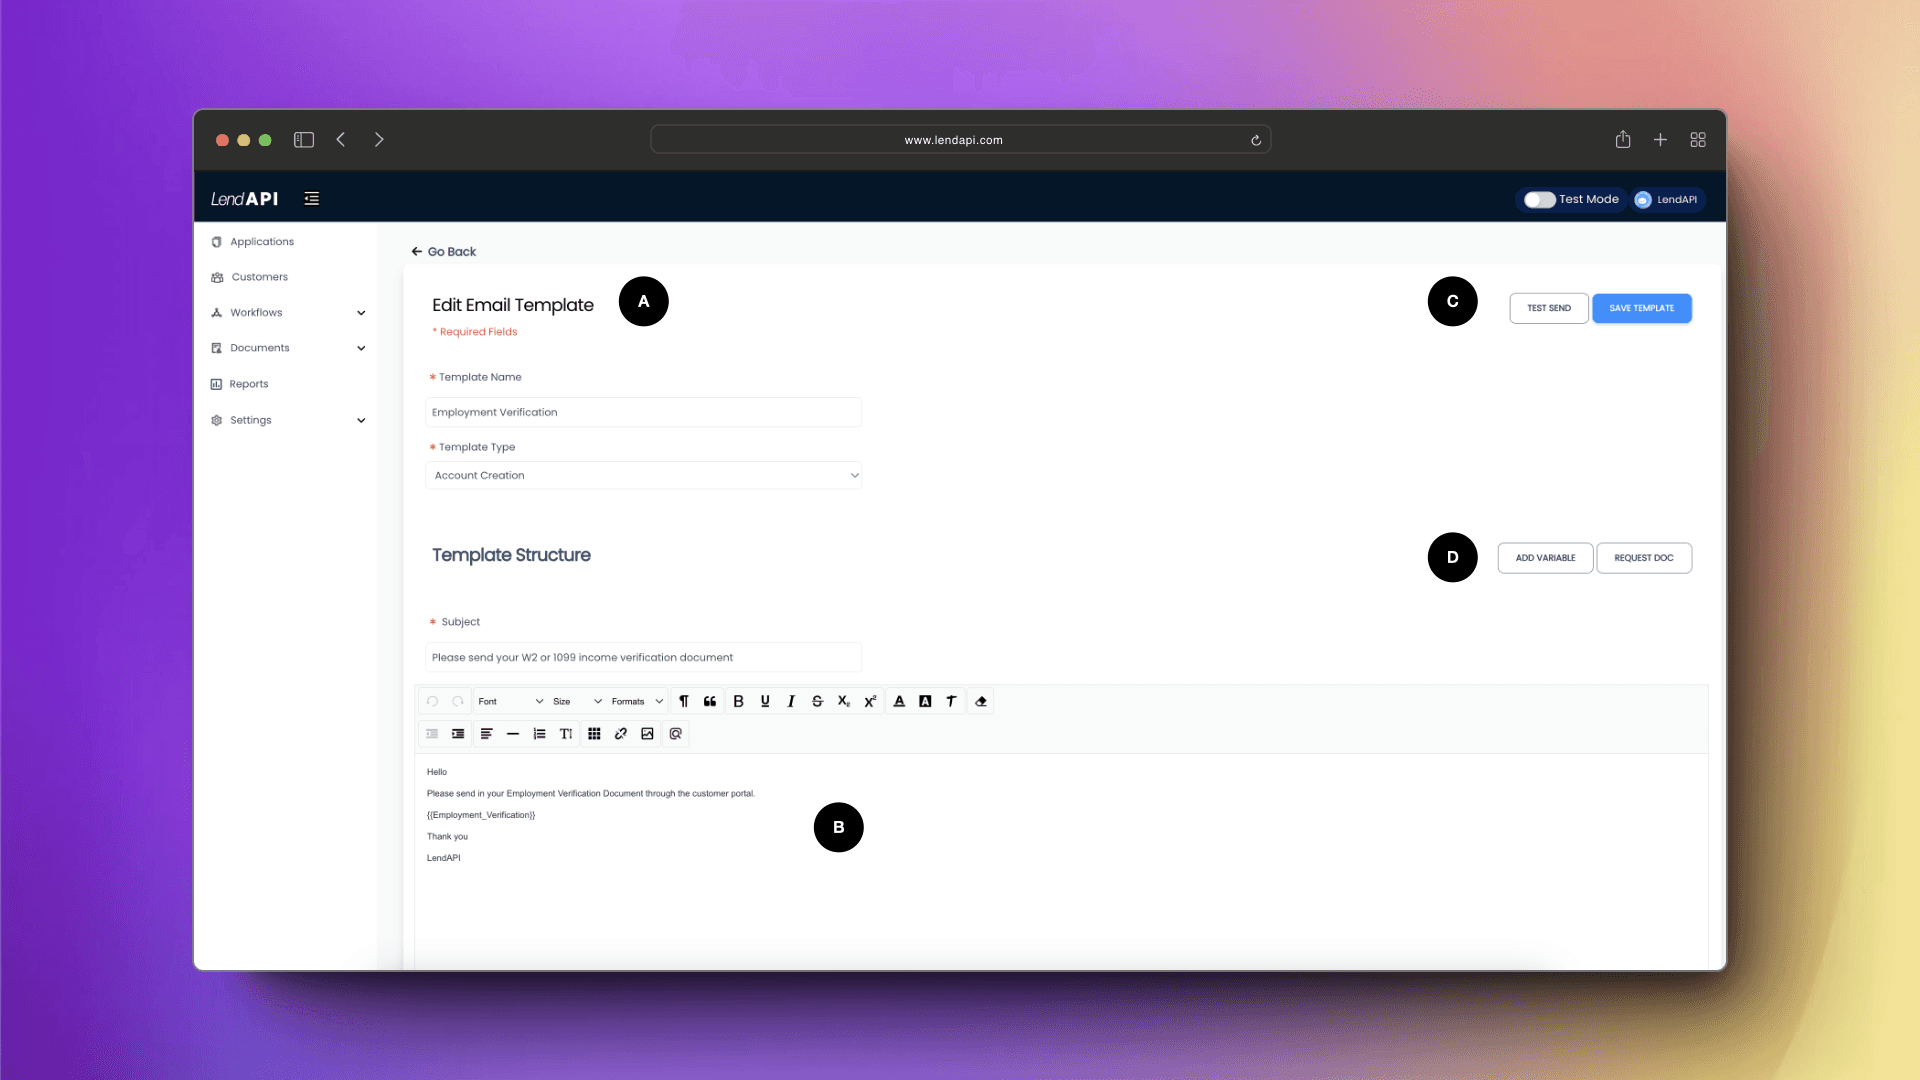
A. Email’s name, type can be defined here
B. Email subject line as well as the body of the email template can be edited and defined here
C. You can test send an email and save this template here
D. You can add system variables or derived variables into your email template here. And of course you can add Doc Upload requests into this email template. When the applicant receives this email, they can click on the link embedded in the email and upload the predefined document requests.
Editing an Email template - Cont
Within the email template, you can also attach a document that’s already generated by the system. Sometimes you would like to write a welcome email with their consent agreements and checking account opening agreements attached as part of the email. In this section we will show you how to do that.
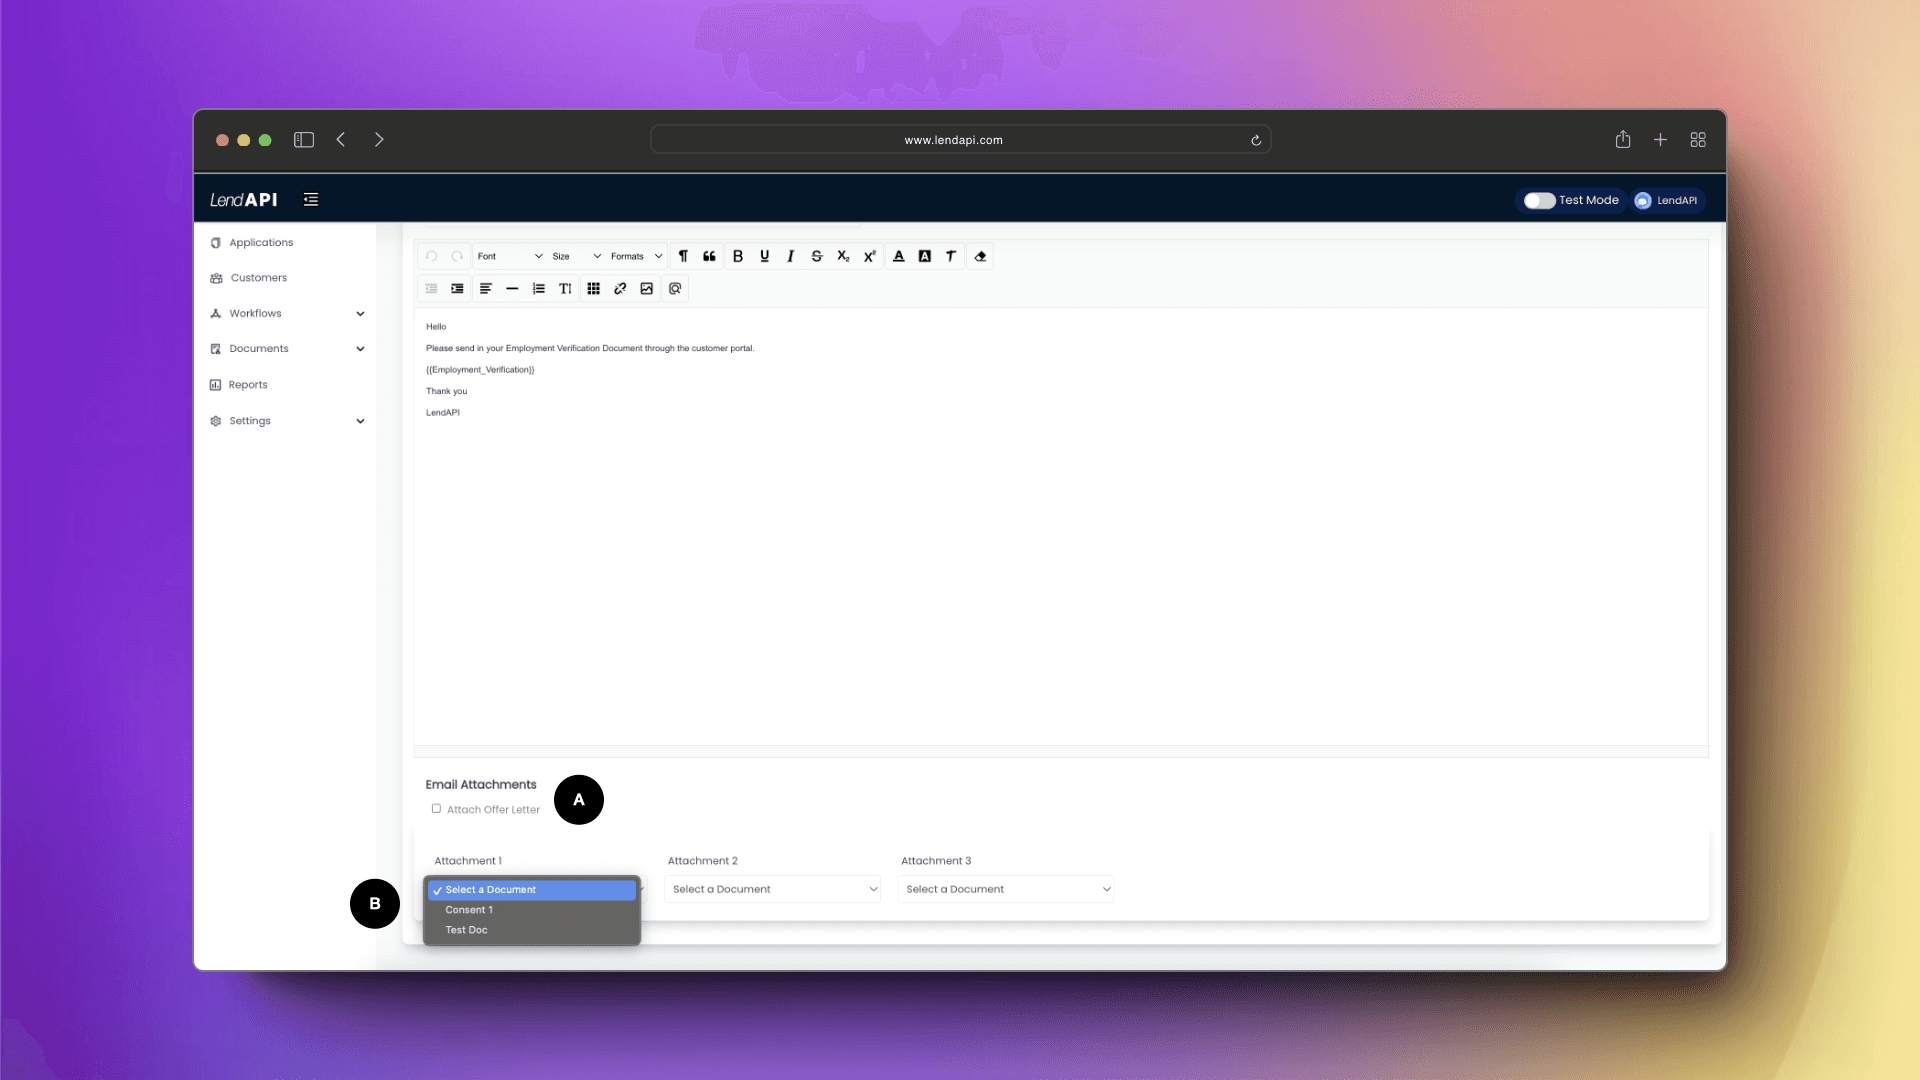
A. By checking this checkbox, the email will include the Offer Agreement as part of the email. This agreement can be an account opening agreement, a promissory note etc. This is completely programmable by you.
B. These attachments gives you the opportunity to select up to three system generated agreements or documents the applicant has signed as part of the email template.
Editing an Email template - Adding Variables
Another powerful feature of LendAPI’s email templates is the ability to embed system and user created variables into your email template. Sometimes you might want to include the applicant’s credit score as part of the decline email. Sometimes you might want to echo parts of their application such as their address in an email. You can even add those custom or derived variables you created in the LendAPI variable library as part of the email template.
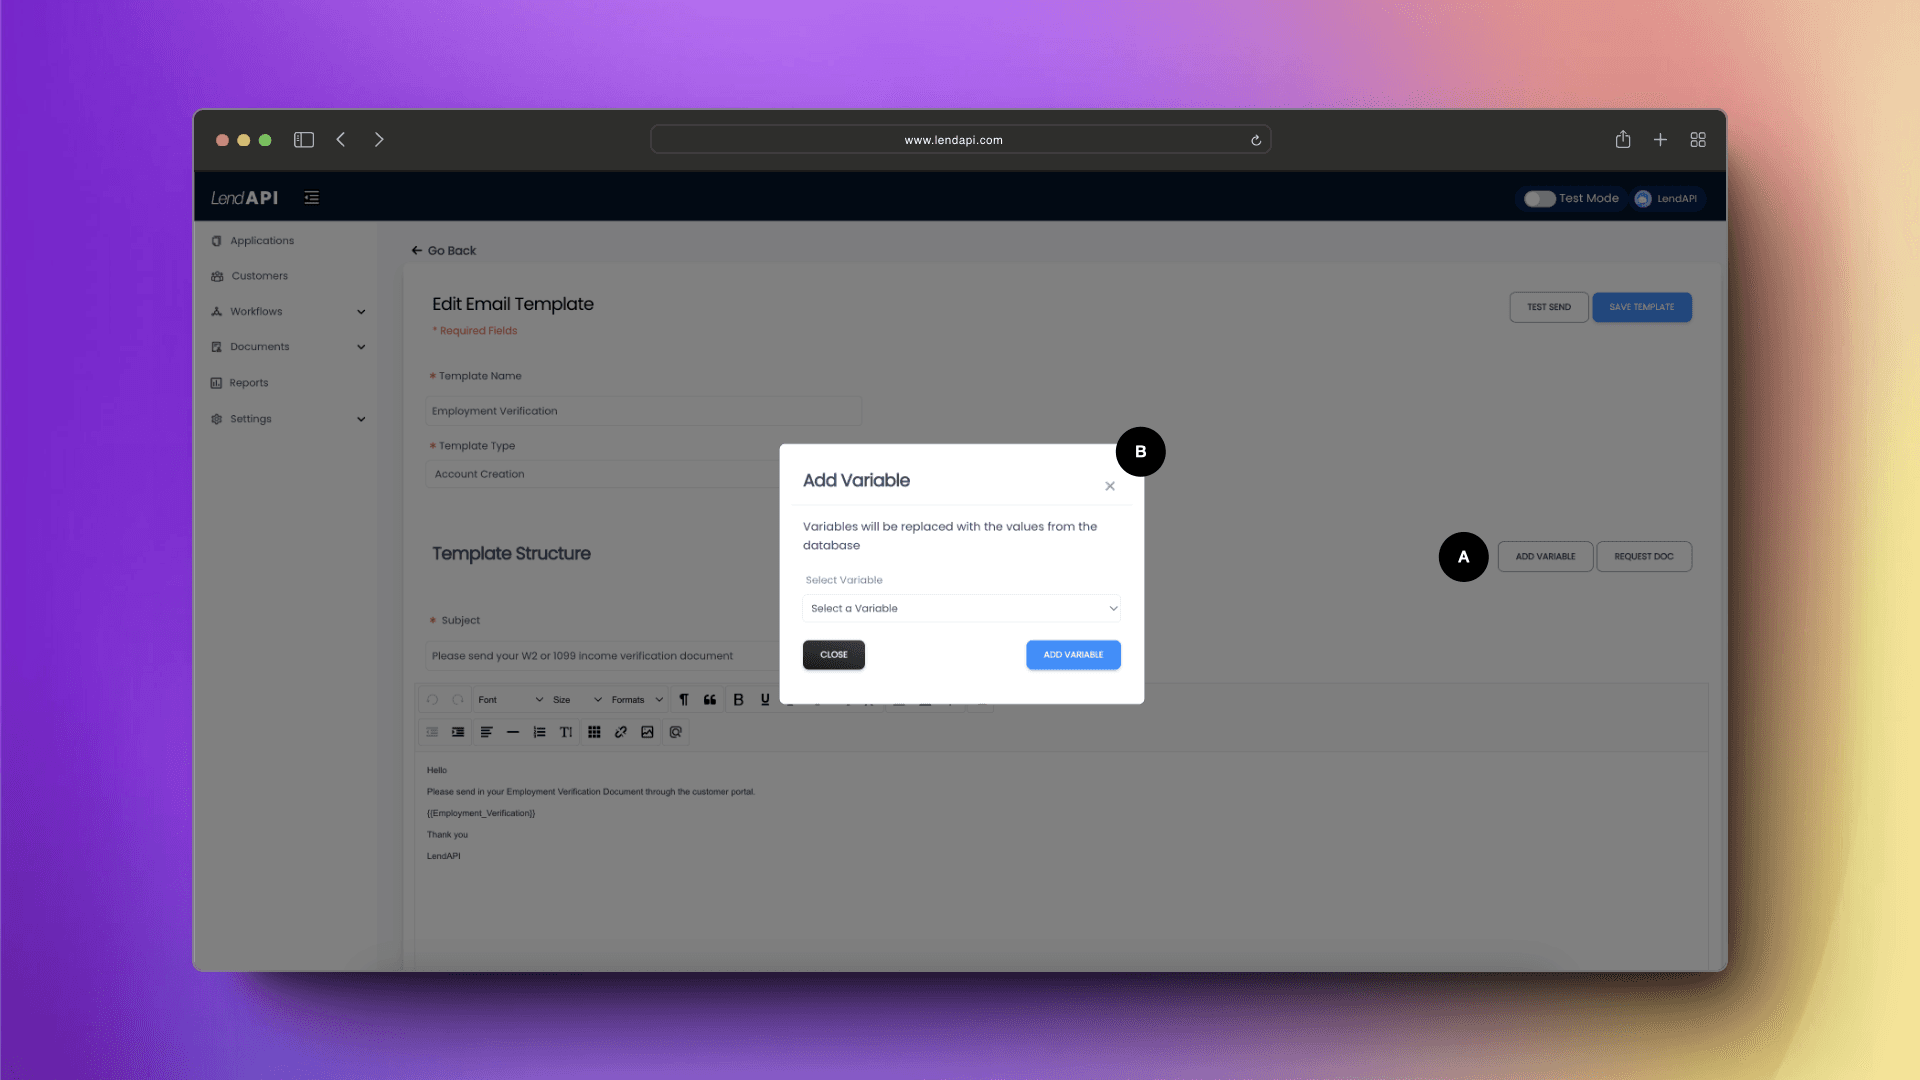
A. Add Variable button will bring up the dialog box for you add a variable
B. Here you can select variables from the variable drop down list which is linked to the variable library
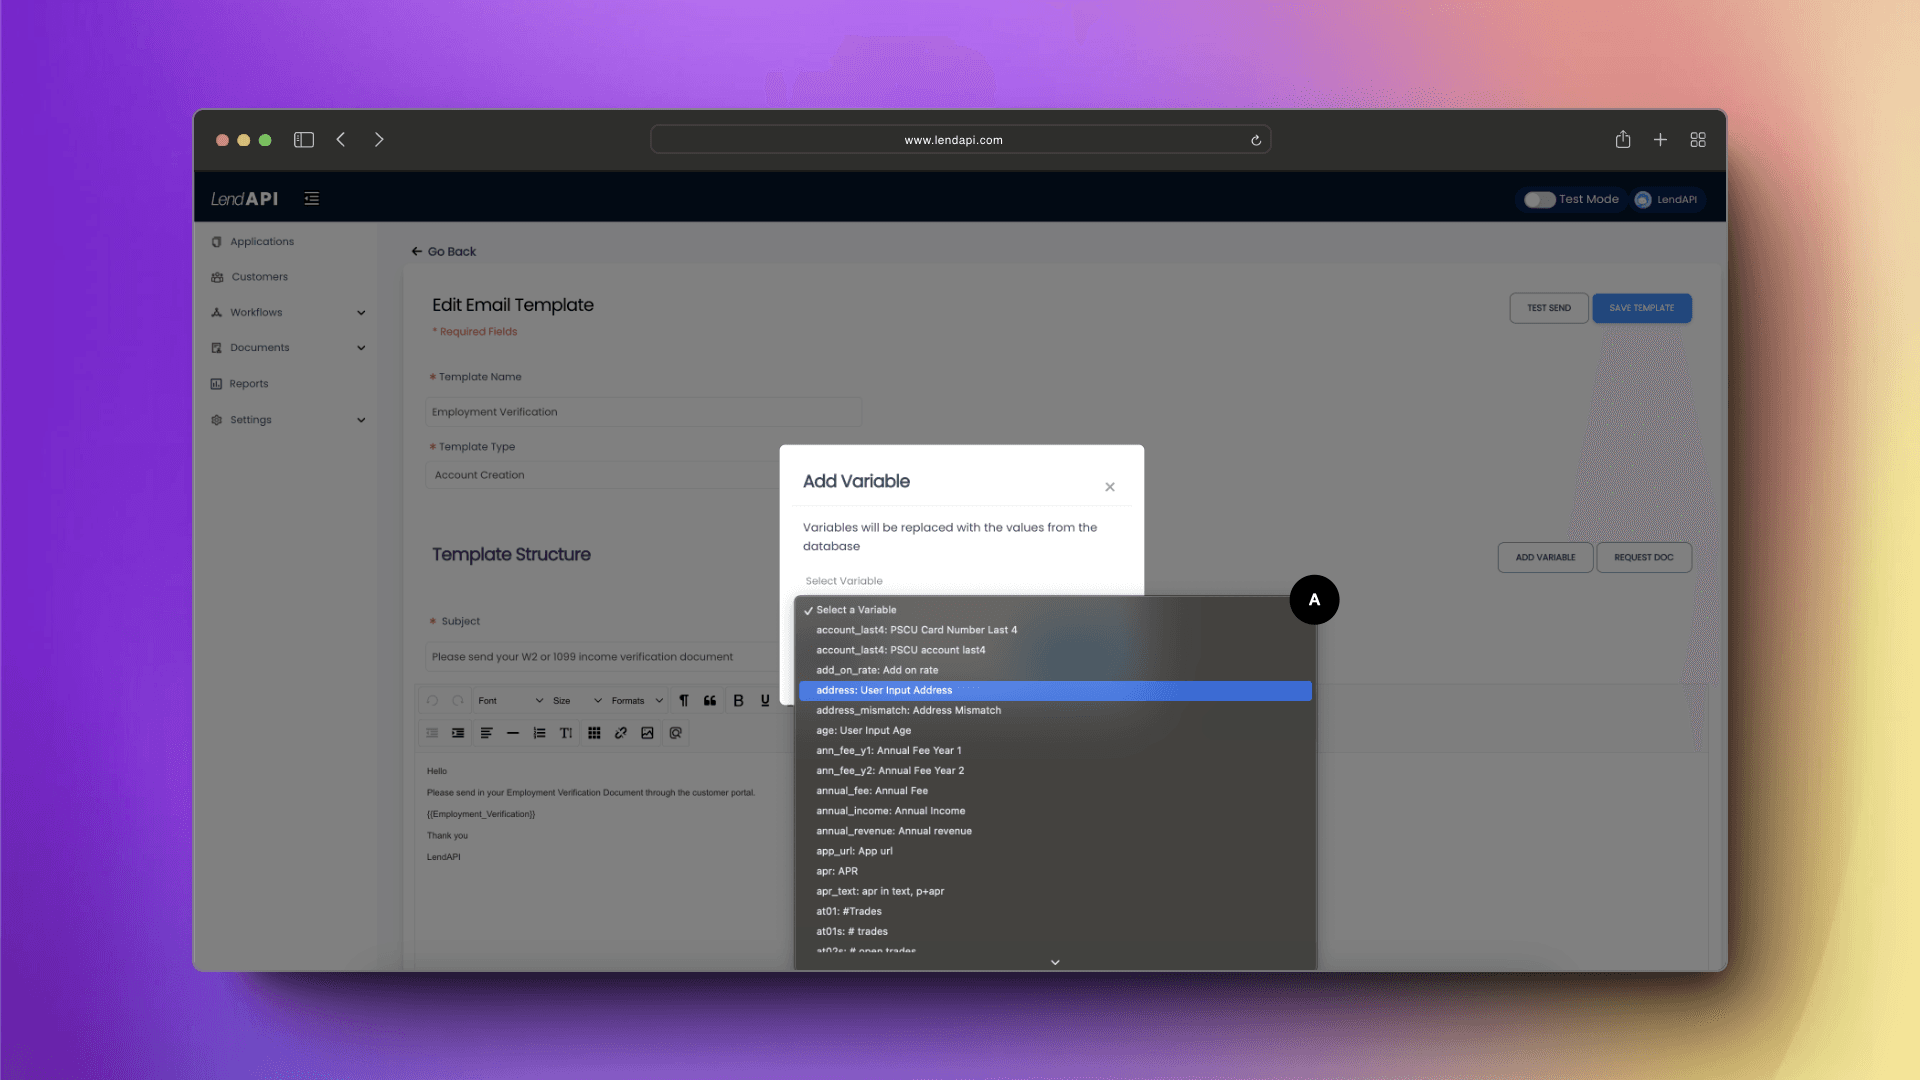
A. You can select a list of variables from the variable library to add to your email template.
Editing an Email template - Adding Doc Upload Request
We mentioned this critical feature on the LendAPI platform when we studied in detail on how Doc Upload Templates work. Here, we are going to repeat that information but from the email template editing perspective. In this section, we will show you how to add a Document Request link to your email template.
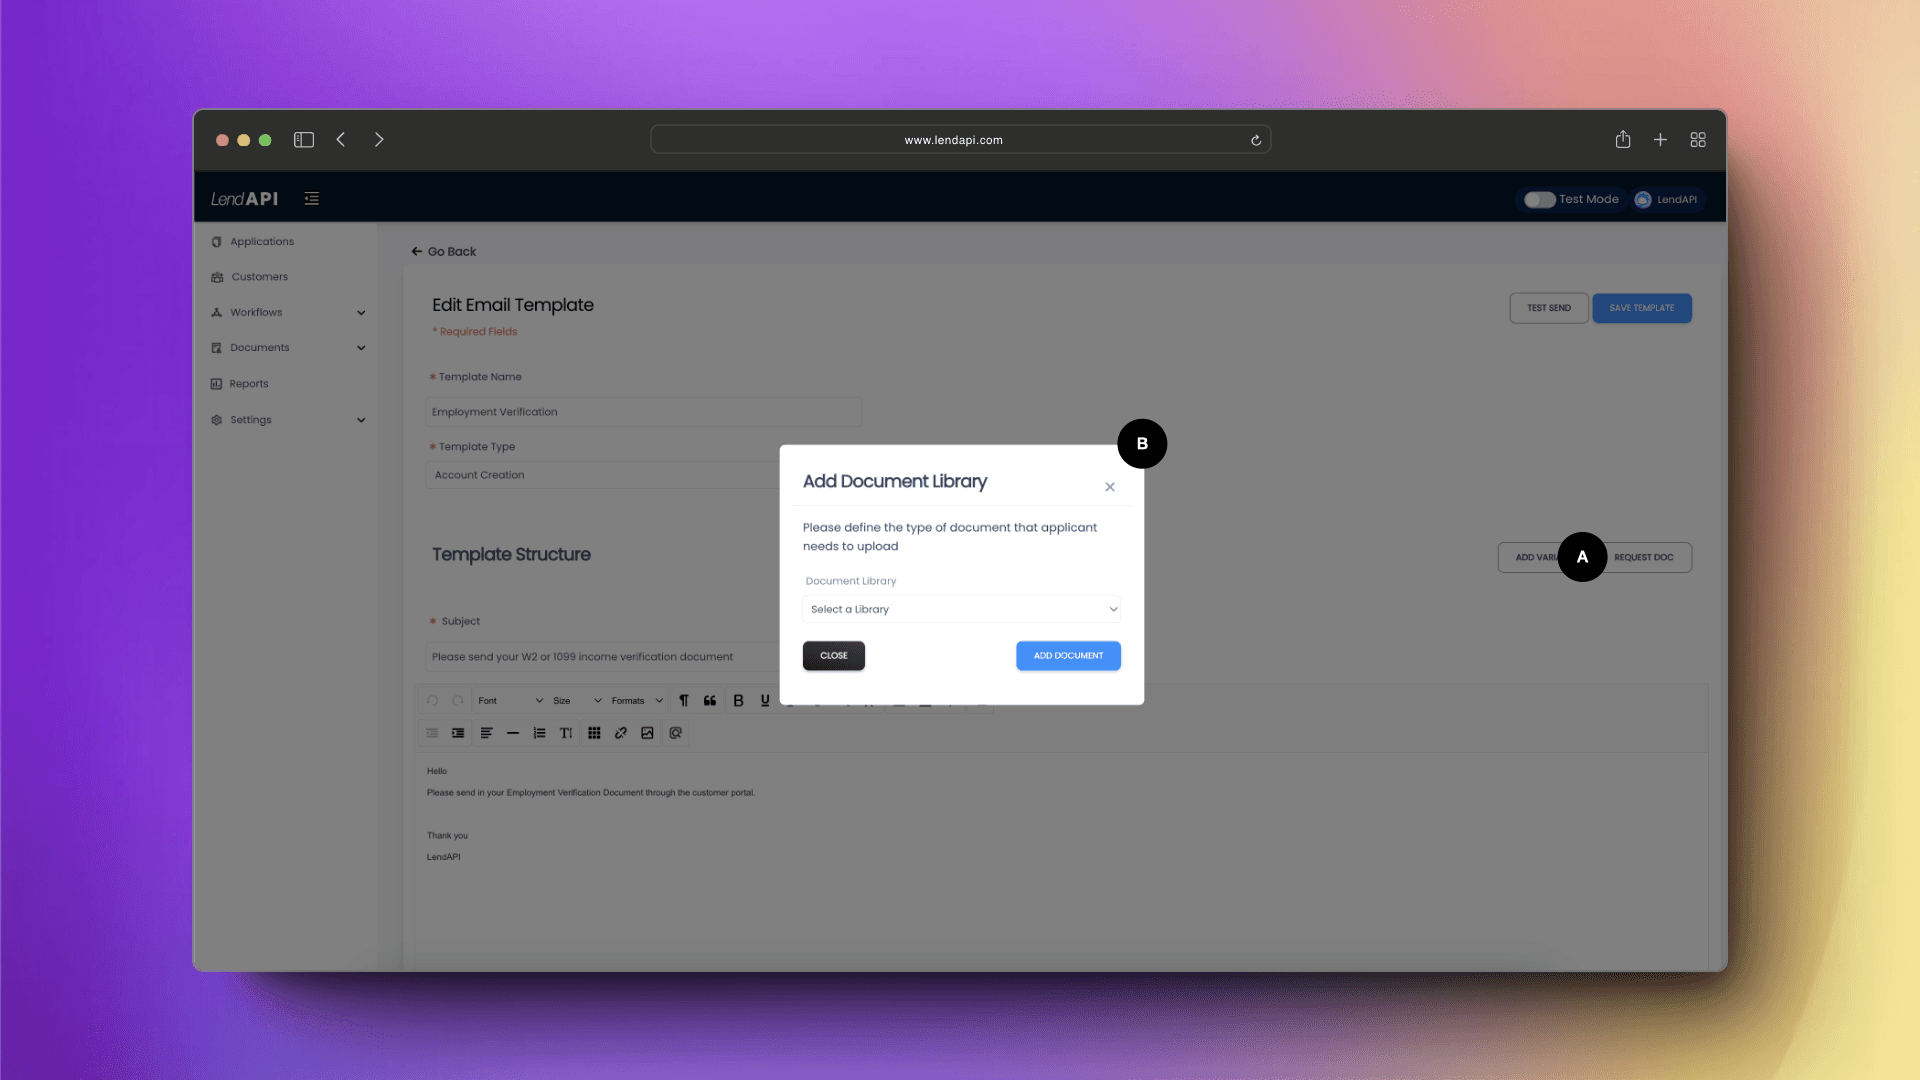
A. The Request Doc button will bring up a dialog box for you to select from a list of Doc Request Templates you’ve built previously. This will create a link in the email template for the applicant to follow through and upload documents.
B. A dialog box will be asking which document request template you would like to attach to this email template.
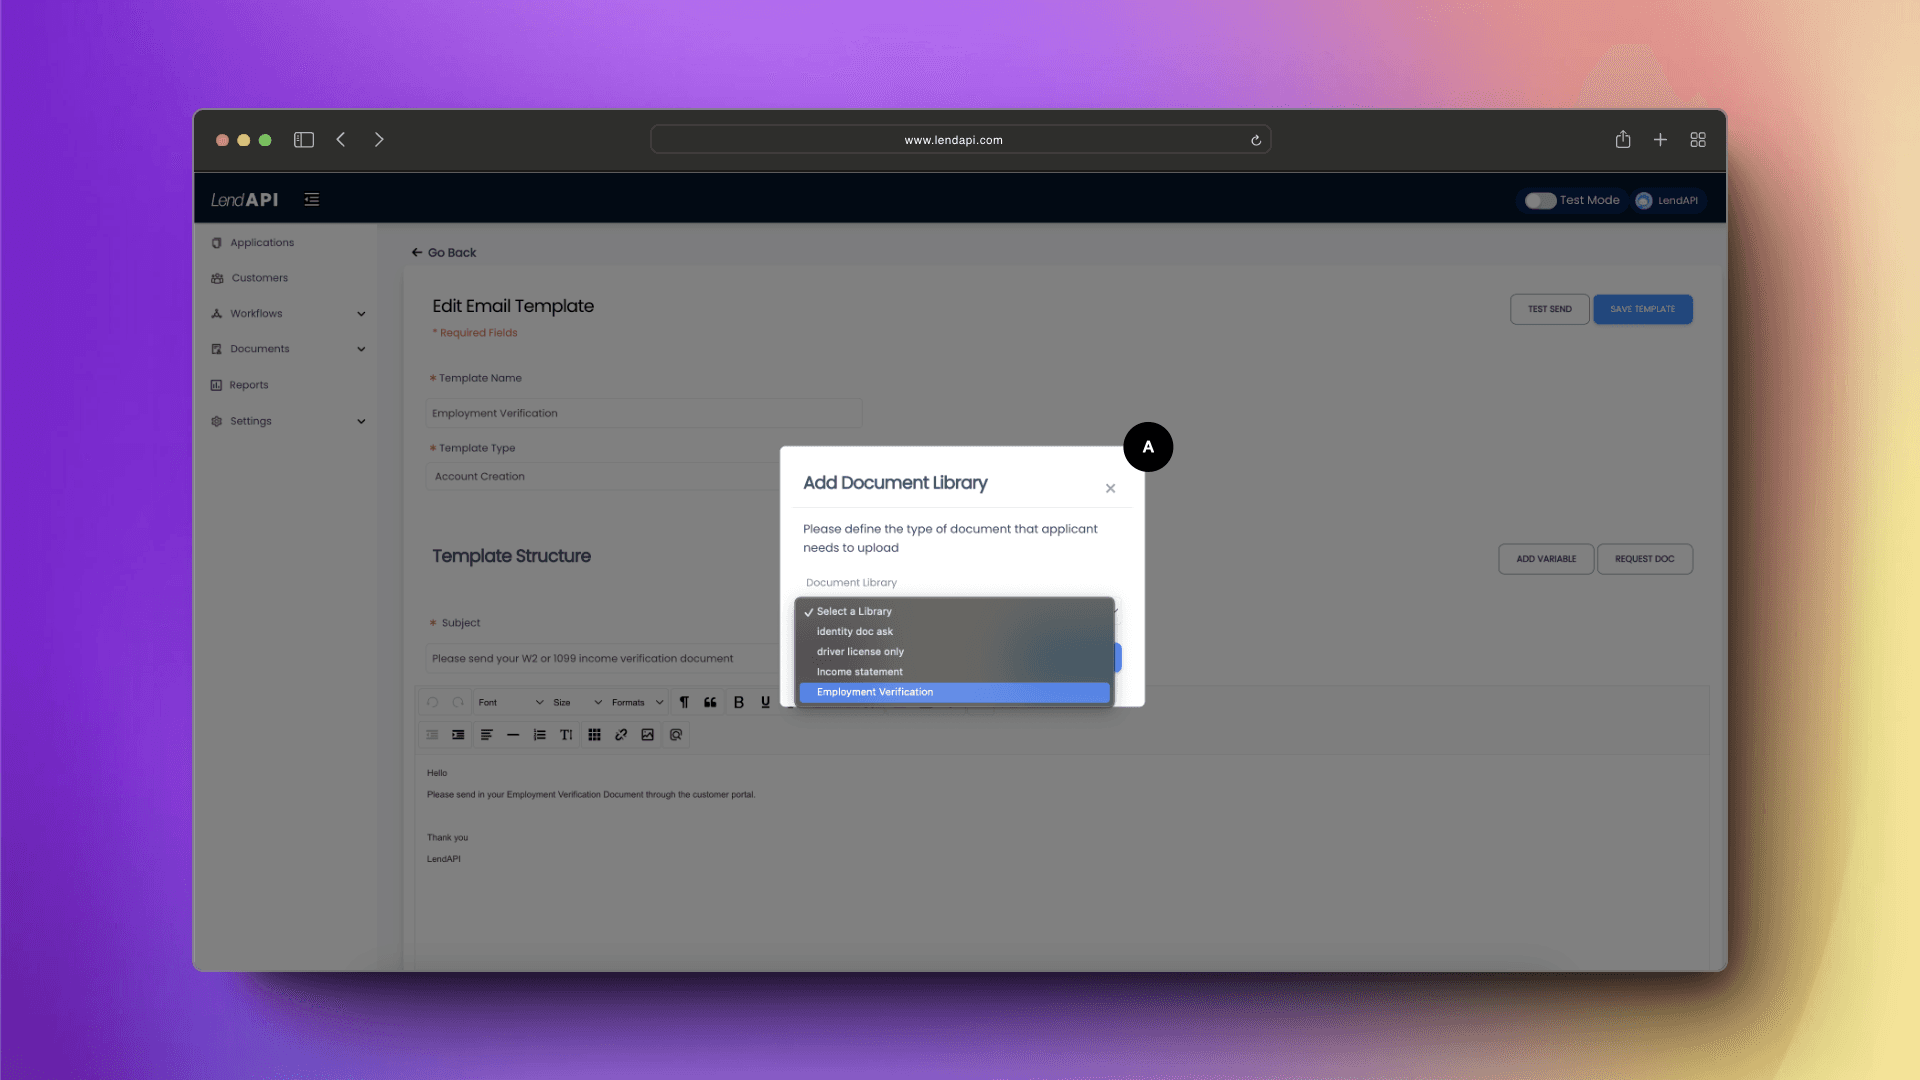
A. A list of doc request documents will appear and we will select Employment Verification from the drop down menu.
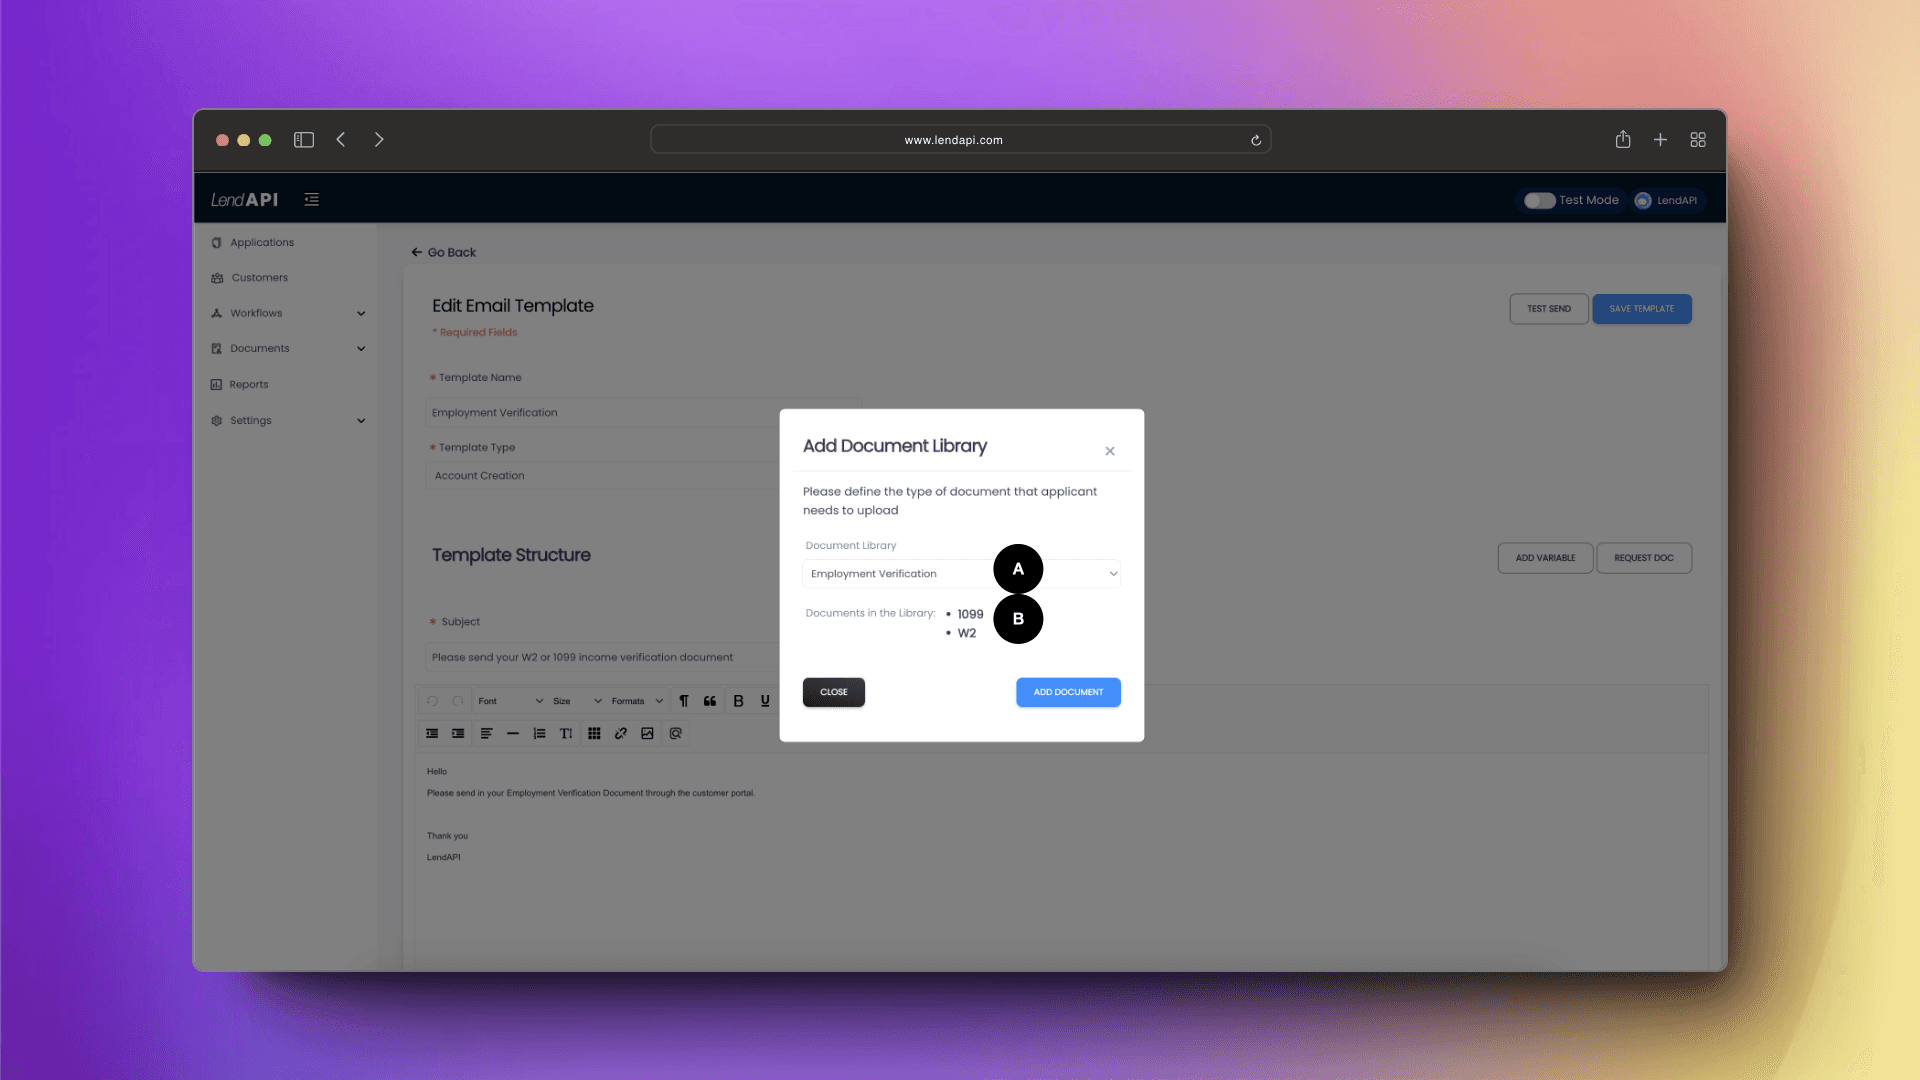
A. Once the Employment Verification document request template is selected. The dialog box will display the content of the doc request template
B. The content of the doc request template will be displayed here. In this example, 1099 and W2 document items will be displayed to visually verify that this is the doc upload template you want.
How do I use Email Templates?
Email templates are used to send emails automatically from certain conditions being met in your decision tree. For a decision tree to fire off an email, we need to revisit the idea of an End Node. Each branch of a decision tree must end at an End Node. These End Nodes will fire off a Decision Action and therefore a Decision Outcome.
Decision Outcome is where you will link your email template to. Whether it is to welcome the applicant with an approval message attached with their agreement, or a declined better with embedded credit score, this is how to link your email templates to your overall decision path.
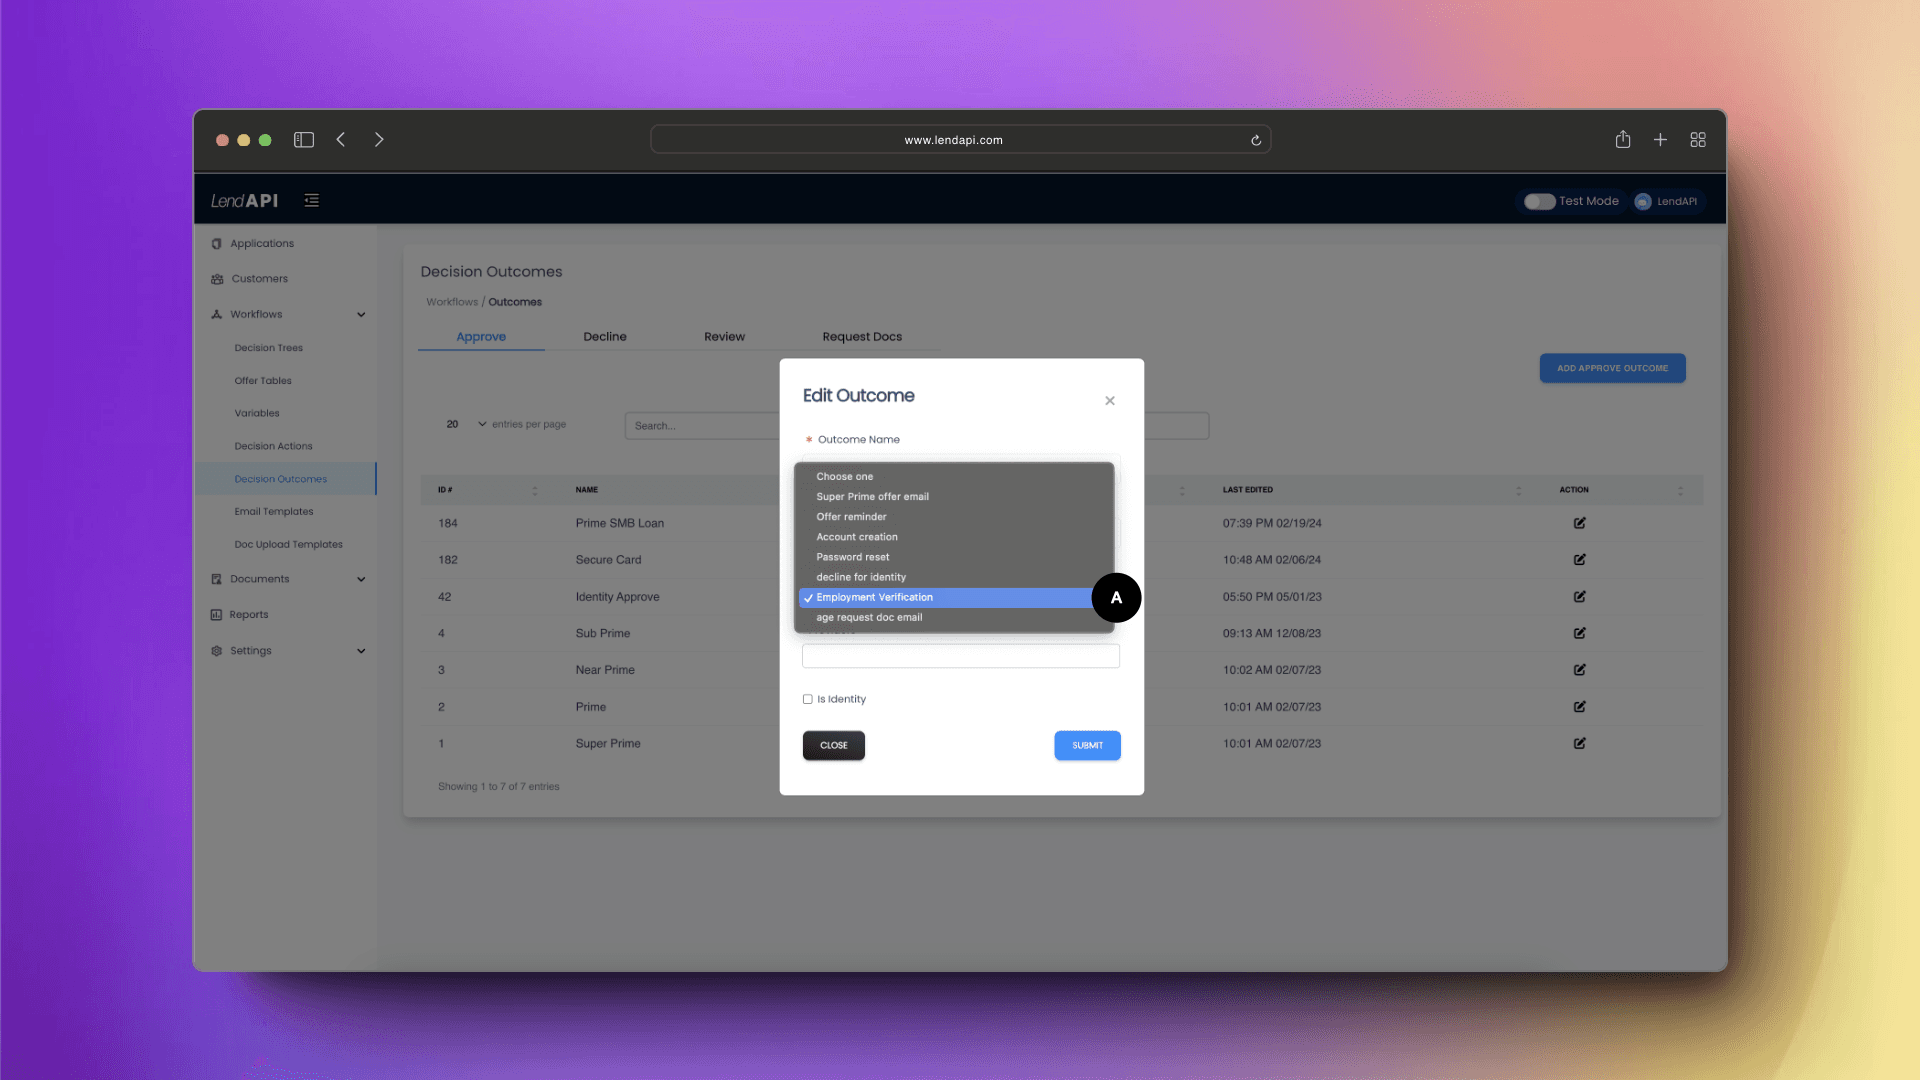
A. From the Decision Outcome setting, you can link your email template. In this case, you can select the Employment Verification email template and link that to one of the Decision outcomes.


